The SharePoint environment is up and running, we can now create a Web Application and a site collection that will be our portal.
The goal is obtain a Web Application with two ‘interfaces’ to the users: we want to expose an internal site to the intranet that will use standard NTLM authentication method and an internet site that will use Forms Authentication; both sites will expose the same contents.
- Intranet site: http://sharepointtest - NTLM authentication
- Internet site: http://www.sharepointtest.com - Forms Authentication
Let’s start creating the Intranet site.
From the steps made before we should already have a new empty content database (SharePointTestContent) to be used by the web application; to create a web application log to the SharePoint Administration Console and look for ‘Application Management’ -> ‘Create or Extend Web Application’ -> ‘Create a new Web Application’.
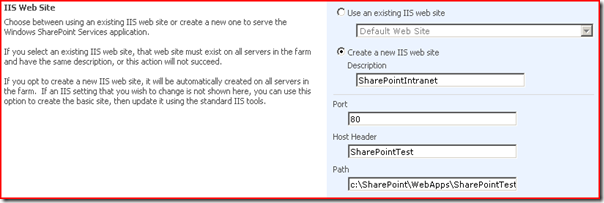
You have to fill-in a form that specifies were to place the application and which database to use as the backend storage; I’ll highlight only the critical sections:
I set the port to 80 and the host header to sharepointtest, I recommend of thinking of ports and host headers to use in advance because, once set, it’s not so easy to change them (as we’ll see at the end of the column).
Change the default path for the web application so it will be created in our new directory structure (in this way you have all your files in a single location and it will simplify the deployment on the production machine at a later stage).
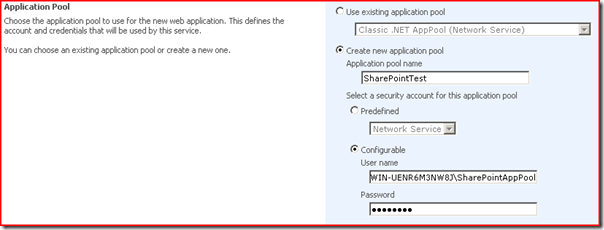
Define an Application Pool and the account under which the site will run.
Specify the content database (created before); if you use Windows authentication make sure have given the right permission to the user defined in the application pool section so she can access the database (that is: give him ‘db_owner’ rights).
We can now create a Site Collection inside the web application: from the administration console select ‘Application Management’ -> ‘Create site collection’; fill in the information required and select a template for the website (I chosen a blank site), wait for the environment to setup the site... et voila, your brand new website is up and running.
We can now put some test content inside the website, for example create a document library and add some files in it).
To create the Internet site we need to extend the web application from the default Zone to the Internet (or extranet) zone, for this purpose we ask SharePoint to create a new website that will be used to present the same content to our external users, after creating the site we change the authorization to Forms Authentication.
To create the new website from the administration console use: ‘Application Management’ -> ‘Create or Extend Web Application’ -> ‘Extend an existing Web Application’
In my test deployment I used with the following settings:
port: 80
host header: www.sharepointtest.com
path C:\SharePoint\WebApps\www.sharepointtest.com80
zone: Internet
before we can use the site we also have to modify the C:\Windows\System32\drivers\etc\hosts file and add the following entries:
127.0.0.1 www.sharepointtest.com
::1 www.sharepointtest.com
so we can browse to the site using the address we specified in the host header section.
After this step we end up having two distinct website: the first to be used in the intranet and the second to be used in an internet scenario. We go on configuring the second one to use Forms Authentication instead of the standard NTLM or Kerberos.
For this purpose we follow the instruction presented here:
Forms Authentication in SharePoint Products and Technologies (Part 1): Introduction
Following the instructions in the above article, we create a new database to hold our users (I named it SharePointUsers)
The test utility they use to create users and roles (MembershipSeeder) is actually hardcoded to be used only with the default ‘aspnetdb’ database, I’ve added a modified version to this article that will allow you to chose also which database to use. You can however use the standard ASP.Net Configuration Application that is generated by Visual Studio when you create a an asp.net website (just create a new website and make the needed changes to the web.config file to enable forms authentication and to point it towards our SharePointUsers database).
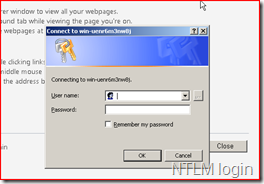
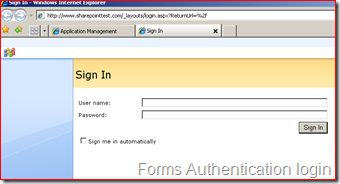
Once we completed all the steps we have our two website up and running:
While trying to setup these two sites I learned an important lesson: think carefully and try to plan in advance which ports and which host headers tag you are going to use; changing them is not so easy SharePoint do not offer a way to modify those values and altering them only in IIS (modifying the parameters of the websites) is not enough.
A procedure to change those values is described here: How to: modify ports and host headers on SharePoint 2007
Essentially what you have to do is extend an existing web application to a new web application with the right parameters and then remove the original one.
MembershipSeeder:
The next step will be how to develop/deploy web parts and how to remotely debug them.
To be continued…
Related Content
- Windows SharePoint Services - Developing and (Remotely) Debugging a Web Part (03/03/2009)
- Windows SharePoint Services - first setup (26/08/2015)
- Winforms: improving rendering performances with BackgroundImage and BackgroundImageLayout (26/08/2015)
- WSS / SharePoint: adding filtering capabilities to the CustomListViewWebPart (Current User Filter and others) (09/11/2009)
- Get SharePoint Designer 2007 for Free (04/03/2009)
- More related document (3)


