SharePoint Services - Setting up a Website with Forms Authentication

The SharePoint environment is up and running, we can now create a Web Application and a site collection that will be our portal.

The goal is obtain a Web Application with two ‘interfaces’ to the users: we want to expose an internal site to the intranet that will use standard NTLM authentication method and an internet site that will use Forms Authentication; both sites will expose the same contents.

Let’s start creating the Intranet site.

From the steps made before we should already have a new empty content database (SharePointTestContent) to be used by the web application; to create a web application log to the SharePoint Administration Console and look for ‘Application Management’ -> ‘Create or Extend Web Application’ -> ‘Create a new Web Application’.

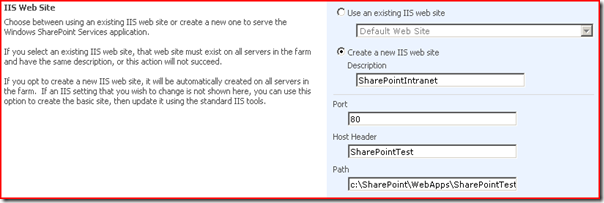
You have to fill-in a form that specifies were to place the application and which database to use as the backend storage; I’ll highlight only the critical sections:

SharePointIISWebsite

I set the port to 80 and the host header to sharepointtest, I recommend of thinking of ports and host headers to use in advance because, once set, it’s not so easy to change them (as we’ll see at the end of the column).

Change the default path for the web application so it will be created in our new directory structure (in this way you have all your files in a single location and it will simplify the deployment on the production machine at a later stage).

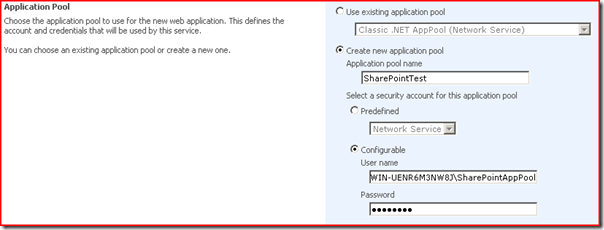
SharePointAppPool

Define an Application Pool and the account under which the site will run.

SharePointDatabase

Specify the content database (created before); if you use Windows authentication make sure have given the right permission to the user defined in the application pool section so she can access the database (that is: give him ‘db_owner’ rights).

We can now create a Site Collection inside the web application: from the administration console select ‘Application Management’ -> ‘Create site collection’; fill in the information required and select a template for the website (I chosen a blank site), wait for the environment to setup the site... et voila, your brand new website is up and running.

We can now put some test content inside the website, for example create a document library and add some files in it).

To create the Internet site we need to extend the web application from the default Zone to the Internet (or extranet) zone, for this purpose we ask SharePoint to create a new website that will be used to present the same content to our external users, after creating the site we change the authorization to Forms Authentication.

To create the new website from the administration console use: ‘Application Management’ -> ‘Create or Extend Web Application’ -> ‘Extend an existing Web Application’

In my test deployment I used with the following settings:

port: 80
host header: www.sharepointtest.com
path C:\SharePoint\WebApps\www.sharepointtest.com80
zone: Internet

before we can use the site we also have to modify the C:\Windows\System32\drivers\etc\hosts file and add the following entries:

127.0.0.1    www.sharepointtest.com
::1               www.sharepointtest.com

so we can browse to the site using the address we specified in the host header section.

After this step we end up having two distinct website: the first to be used in the intranet and the second to be used in an internet scenario. We go on configuring the second one to use Forms Authentication instead of the standard NTLM or Kerberos.

For this purpose we follow the instruction presented here:

Forms Authentication in SharePoint Products and Technologies (Part 1): Introduction

Following the instructions in the above article, we create a new database to hold our users (I named it SharePointUsers)

The test utility they use to create users and roles (MembershipSeeder) is actually hardcoded to be used only with the default ‘aspnetdb’ database, I’ve added a modified version to this article that will allow you to chose also which database to use. You can however use the standard ASP.Net Configuration Application that is generated by Visual Studio when you create a an asp.net website (just create a new website and make the needed changes to the web.config file to enable forms authentication and to point it towards our SharePointUsers database).

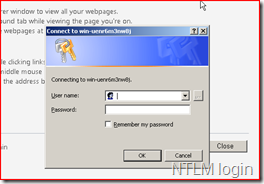
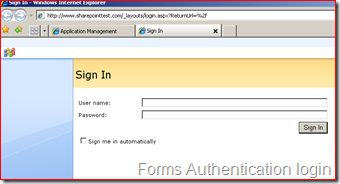
Once we completed all the steps we have our two website up and running:

SharePointNTLMLogin SharePointFormsAuthLogin

While trying to setup these two sites I learned an important lesson: think carefully and try to plan in advance which ports and which host headers tag you are going to use; changing them is not so easy SharePoint do not offer a way to modify those values and altering them only in IIS (modifying the parameters of the websites) is not enough.

A procedure to change those values is described here: How to: modify ports and host headers on SharePoint 2007
Essentially what you have to do is extend an existing web application to a new web application with the right parameters and then remove the original one.

MembershipSeeder:

The next step will be how to develop/deploy web parts and how to remotely debug them.

To be continued…

Related Content


Windows SharePoint Services - first setup

I know that SharePoint 2007 and SharePoint Services 3.0 are out since some time... but I never had the occasion to work with them yet. However in a recent project I’m evaluating it can fit well some of the needs of the customer, so I need to play with it a bit and setup a machine for testing.

My Italian user-group (DotNetMarche) organized a workshop on SharePoint and SharePoint Services some time ago, so I started checking again the slides and documentation the speakers proposed.

The major problems I want to address are:

1- how to setup a good development machine for WSS 3.0

2- how to put remote debugging to work (it can be very useful if you can’t install Visual Studio on the development or testing machine)

3- how to handle SharePoint security and how to integrate (if it’s possible) a series of site built upon WSS 3.0 with a preexisting ASP.NET web application providing Single Sign-on between the two.

The first thing to do is gather some documentation, I’ve spent the last two days reading and watching tutorials; the idea is to gather as many infos as possible and try to solve the problems before they hit you, so here are some links:

DotNetMarche - Microsoft SharePoint Workshop

Installation WSS 3.0

SharePoint End User Security

How to get Remote Debugging work properly

I will put myself in the worst case in a windows network for a developer: the machines aren’t member of a Domain, no Active Directory, no administration policies; that means we have to create all the users we need locally on each machine and grant them the right permissions.

I recommend reading carefully the ‘Installation WSS 3.0’ post on www.sharepointforum.com cause it will lead you step by step in what you have to do to successfully setup a machine with WSS 3.0.

The fist steps before installing WSS 3.0 are to setup a Virtual Machine (use a physical machine) with Windows Server 2003 or 2008; make sure it’s configured as a web server (enable/install IIS and configure it) and finally install a SQL Server (even express is good, I recommend an Advanced Edition so you can take advantage of the full-text indexing capabilities too) and define a database on it to hold SharePoint data.

It’s also recommended to create a Windows account that will be used by SharePoint to connect to the configuration database and one further account for each web application you are going to define (they will be used to specify under which user the application pool will run and will connect to the website specific database); if you don’t have a domain a local account will be good; the user must be granted with sysadmin and db_owner rights in SQL Server in order to be correctly used by SharePoint.

If you want to avoid having all your SharePoint files and applications spread around various directory in your system, I suggest to create a SharePoint folder with this structure and use it as your main SharePoint repository for applications and databases:

SharePointFoldersStructure

If you use that directory structure you will have to create the databases in advance (to avoid them being placed in the default SQL server data directory), if you do so remember to use ‘Latin1_General_CI_AS_WS_KS’ as your collation rule; plus you have to grant to the Windows Accounts that SharePoint uses db_owner rights to each database.

So I started by creating 2 user accounts like the ones suggested in the installation guide:

  • SharePointDB - used to access the main configuration database.
  • SharePointAppPool - will be used by the WebApplication application pool and to connect to the website specific content database.

Then I manually created 2 empty database inside X:/SharePoint/Database: the first named ‘SharePoint’ that will be used to hold the general administrative settings, and another one named ‘SharePointTestContent’ that will be used later by the test WebApplication created inside the SharePoint environment.

From SQL Management Studio set the right permissions for the users: SharePointDB should have the role of ‘sysadmin’ and ‘db_owner’ right for ‘SharePoint’ database, SharePointAppPool must have ‘db_owner’ right over ‘SharePointTestContent’ database.

We are now ready to perform the WSS 3.0 installation.

Since I’ve done all the preliminary steps by myself, for this test I’m not performing a Basic or Stand Alone installation, I’ll rather try to setup a ‘Farm’ with WSS 3.0; so when I’m asked to choose which installation type to perform I will go for ‘Advanced’ and then ‘Web Front End’; it’s now just a matter to follow the wizard steps and when you are asked to specify which database to use just use the one you have previously prepared.

When the installation process finishes you’ll be able to see the SharePoint Central Administration console.

To be Continued...


Related Content


New Revenant (World or Warcraft Sunstrider Alliance Raiding Guild) website online

I’ve spent the weekend playing with MySql and Php-Fusion to setup our World of Warcraft Guild website.

I have to admit that using and customizing Php-Fusion was quite easy considering that I knew nothing about php before trying this experiment.

Anyway I believe the result is quite good for a 3 days of work done in the spare time.

If you are curious or if you simply are a World of Warcraft player, go check Revenant’s Website at:

Revenant Guild Website

and if you play on Sunstrider (EU realm) consider making an application to our Raiding Guild, you’ll find a friendly and relaxed environment with great guys with whom spare some fun.

Related Content


How to use the Class Diagram designer in a Silverlight Project

If you are looking for the class designer when working with a Silverlight project you will notice that apparently you cannot use it, doing right click on the project and selecting ‘add new item’ bring you the following dialog box:

Install SQL Server (Express) with your Application

During the last days I had to put my hands on an hold project written for .NET Framework 1.1 and convert his database from Access to SQL Express 2005, the conversion was quite easy but then the deployment phase stepped in.

We had the requirement of allowing the deployment of the database engine along with the application (ClickOnce is not an option in VS.2003 :D), the Setup project that comes along with VS 2003 rely on merge modules to install external components, but unfortunately no merge module exists for SQL Express (they have been deprecated). So I started looking around for a solution and I came to this msdn article: Embedding SQL Server Express into Custom Applications.

Basically they suggest to write down a wrapper around the installation of the two components (SQL Express and the application) and launch the SQL installer in unattended mode with a shell command like: “start /wait setup.exe /qb /settings c:\template.ini” in which the configuration settings are passed in using the template.ini file or passing all the configuration parameters as command line arguments.

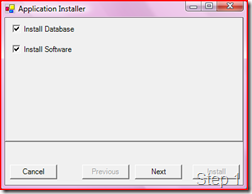
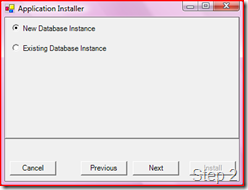
So I took out the code they present in the article, corrected a few minor problems and created a basic installation wrapper that offer the option to select if install the SQL Engine (along with the database files or with a series of scripts to create the databases...this implementation is left to you in this sample project), one or more MSI packages that install the real application software or both.

The wizard is graphically ugly to see (some screens follows) and you need to customize it to fir your company installation templates styles; the code behind surely need some refactoring but it actually works.

InstallerBootStrap1 InstallerBootStrap2

Visual Studio Equalizer - Blinking Caption

When I work on repetitive or very simple tasks I’m used to listen to some heavy metal music and some to some internet radios (by the way ‘Epic Rock Radio’ really rocks).

I just ended my work and was about to close Visual Studio 2008, the radio was still playing in the background and...Visual Studio refused to close...plus I noted a very strange thing: is the Minimize Button blinking following the rhythm of the music !?!?!?!?

I couldn’t believe it and I had to take some videos, the quality isn’t the best cause I took them with the first thing it came into my hands (a small photo camera); but it was a so curious thing that I had to report it here!

here are the videos: